Sony’s newer cameras have been offering an in-camera HDR (high dynamic range) function.
When you select this “auto HDR” mode, you can also set the EV (exposure value) range from 1 to 6. This is a total range and not the spacing between each of the 3 images it will shoot. So far, I’ve just been using the 6 EV range and been quite happy with the results.
When this mode is selected, the camera takes 3 quick images with the proper over/under exposure values and then combines them, automatically, to produce an HDR image. One nice thing it also does is to save the normal exposed image in addition to the HDR. This allows you to have at least the normal exposure in case you’re not pleased with the HDR.
At first, I was skeptical and then not particularly impressed with the output. The images had a flat look that seemed to lack contrast and color saturation. However, as I began to work with the HDR images, I found that just a bit of post processing could correct that. And, in retrospect, it actually makes sense. The HDR image was doing what it was supposed to do … i.e. save the highlights and shadows for you, such that the detail information was preserved.
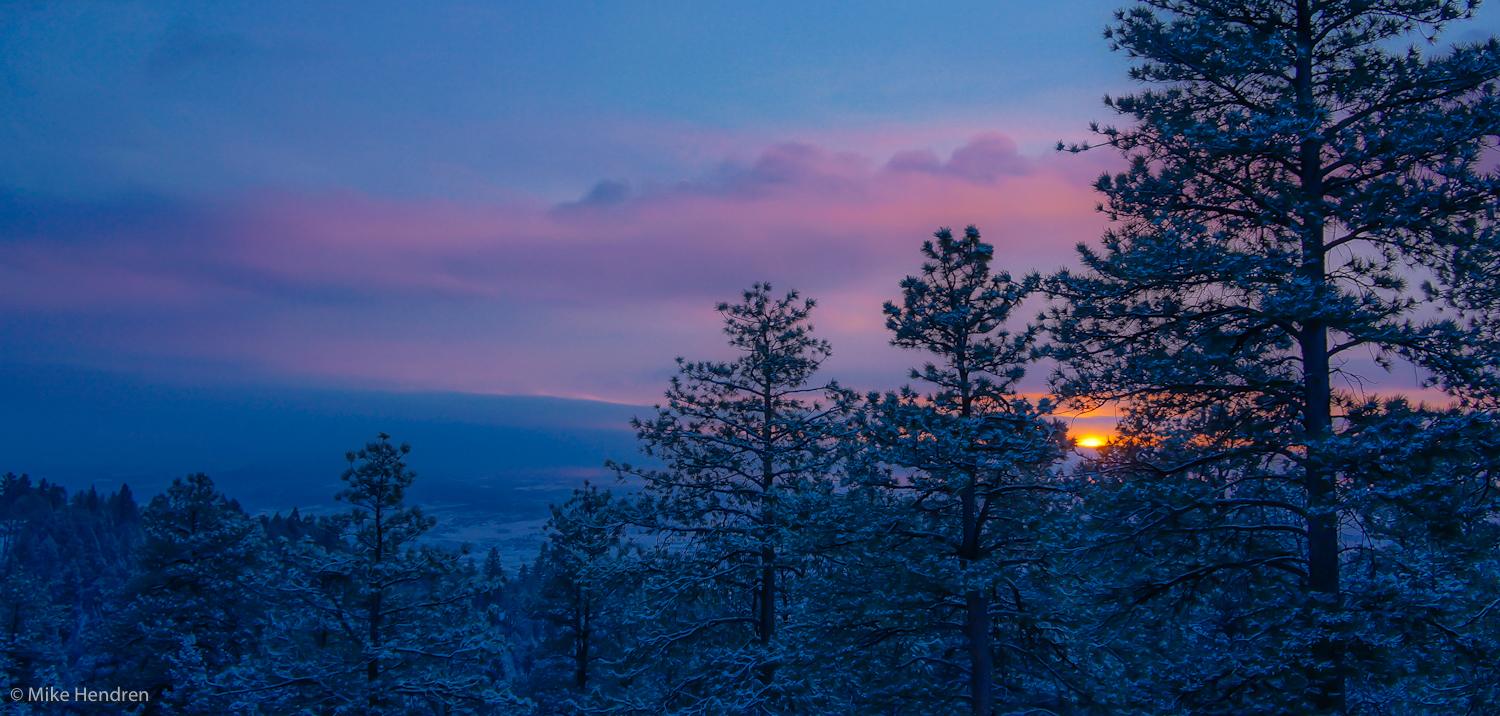
In this sunrise image, the auto HDR worked great. It preserved the detail in the brighter clouds, didn’t allow the sun to be completely blown out, and also saved the shadow detail in the trees.
It seems, the more I use it … well, the more I use it. 🙂 What I mean by that is that as I become more adept at working with the HDR image it produces, I find I am more likely to use that feature. There’s really not much to lose – if the auto HDR doesn’t produce for me, I always have the normally exposed image to work with.
So, if you have an NEX-7, give it a whirl – I think you’ll like what you see!
Sony NEX-7 w/Sony 18-200mm OSS; auto HDR
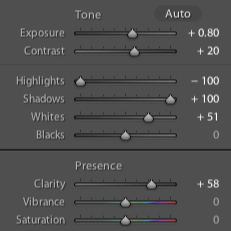
Lightroom 4 (beta)