
http://thrumikesviewfinder.blogspot.com/2014/02/setting-up-olympus-om-d-e-m1-my-way.html
This is the 2nd update to this post, so I hope it doesn’t become too confusing.
 |
| Olympus OM-D E-M5 w/Power Battery Holder (HLD-6) |
I love the OM-D … it’s an awesome little camera. Now, with the Power Battery Holder (PBH) on it, it’s even awesomer! Bigger, but better. In a nutshell, the PBH gives a better way to grip the camera with both normal and portrait (vertical) handgrips. Plus, it allows you to add an extra battery, thereby doubling your shooting time, and it gives you two more customizable Fn (Function) Buttons.
The PBH comes in two pieces, the hand grip and a separate battery compartment which also has the vertical grip and Fn buttons. Above, you can see the OM-D with both of them mounted. Below, I’ve shown the camera and the two parts separated.
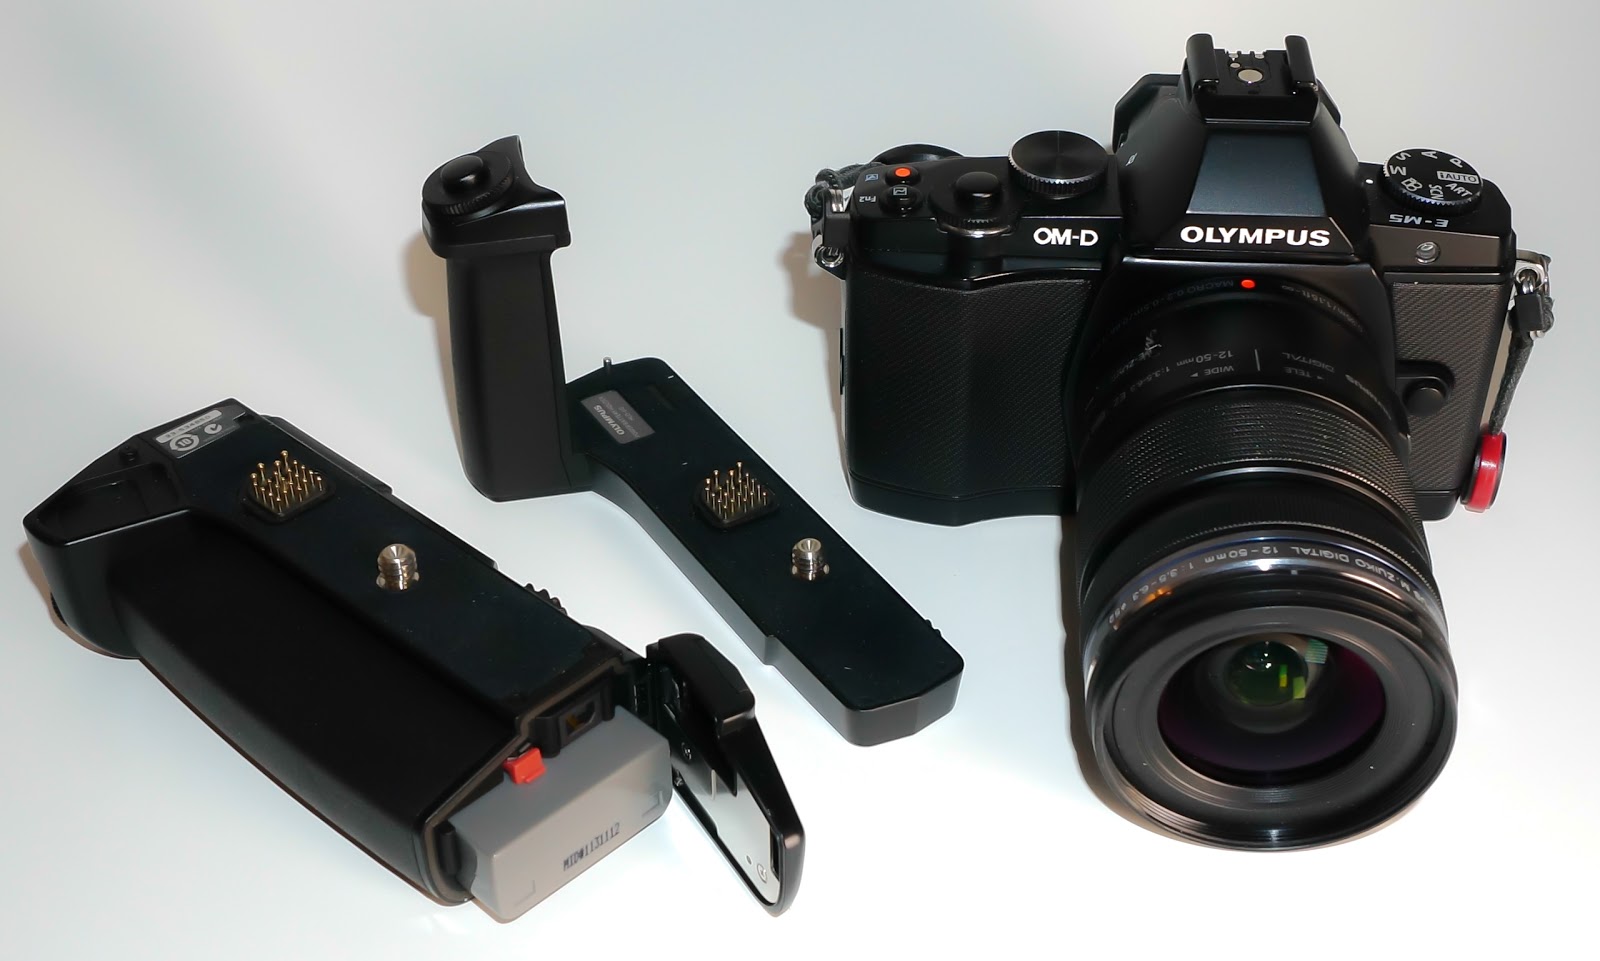
First you add the hand grip to the camera and that is actually my favorite way to use the PBH. Personally, with the battery holder added it just makes the camera a bit too big and heavy for normal use. But, when you need the extra power, it’s great. Below, is the camera with just the hand grip and you can see that it really doesn’t add much height to the camera – only about 7/16″. But what it does do for you is give you a terrific hand grip wrapped around the right front that has it’s own shutter button and front control dial. It’s a feel much like the Nex-6 or Nex-7 if you’ve ever held one of those cameras, and it makes the camera very easy to carry.

Now, when you need that extra battery, you just add the battery holder to the bottom of the hand grip (unfortunately, it can’t be added to the camera without the hand grip). Then, in addition to the extra battery, you’ve just added the vertical grip (with shutter button and front/rear control dials) for doing portrait work, and two more Fn buttons, B-Fn1 and B-Fn2. These buttons can be programmed to do totally different things from the other buttons on the camera. I have mine set so that B-Fn1 moves my AF point to the home position, and B-Fn2 turns on the Digital Tele-converter.
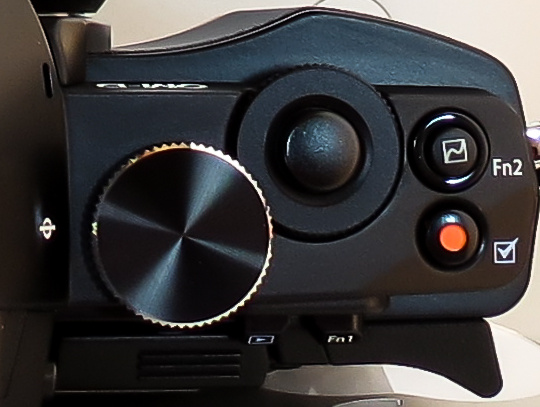
Below, you can see the various controls on the battery holder.

The one switch we haven’t discussed yet is the “Lock” switch. When in the Lock position, it locks out the Shutter and Fn Buttons on the battery holder to prevent accidental actuation. And I might add that the shutter button rests directly against the meaty part of my palm so I accidentally actuate it fairly often. I really, really wish though that Olympus would make it so that it ONLY locked out the shutter button so we could still have access to the two Fn Buttons down here.
Just a couple of more things to know about this:
- When it is attached, you must remove it to change the battery that is in the camera.
- However, you do have the ability to tell the camera which battery to use first. So I set it to use the PBH battery first and then I can just change that battery when it gets low, keeping the internal battery in reserve.
I recently had breakfast with a friend who also has the Olympus OM-D E-M5. We had a good time talking about our experiences using this great camera and sharing some of our own personal settings. As I was talking about the way I had customized the various buttons, it occurred to me that I rarely used the “Video” button which I had set to engage AEL. Instead of pointing the camera in a different direction, engaging AEL, and then reframing to take the shot, I find it so much easier to just look through the EVF and adjust the exposure to where I want it using the “Sub Dial” (the front dial that surrounds the shutter button).

The menus of the Olympus OM-D E-M5 present a deep, but well organized hierarchy of all the functions and settings that can be changed on this camera, and there are many. Some have written that it is too complicated, but my feeling is that this complexity is what allows us the ability and freedom to customize this camera to our own personal taste. So while it may take a bit of study to figure out exactly how to set it up to your liking, the end result is well worth it.

On the back of the camera, I’ve set the “Arrow Function” keys to Direct Function. The default setting for these arrow keys is to move the AF point around, but they are “hot” all the time and I kept inadvertently moving them with my thumb. The Direct Function setting allows me to use the Right Arrow to bring up the ISO menu for quick changes, and the Down Arrow to change the Drive Settings, which I frequently use. Also in Direct Function, the Left Arrow will activate the AF point selector so you can move the point around to any of the 35 points or select All Points which allows the camera to automatically select a point based on what it perceives in the photo. Lastly, the Up Arrow activates the ability to set Exposure Compensation using the arrow keys … but this is a waste for me since I always use the Front Dial for this.
- Aperture Mode
- ISO 200
- Sequential High Speed (9 fps)
- AEB set to bracket 5 images with 1 EV spacing between each one
