 |
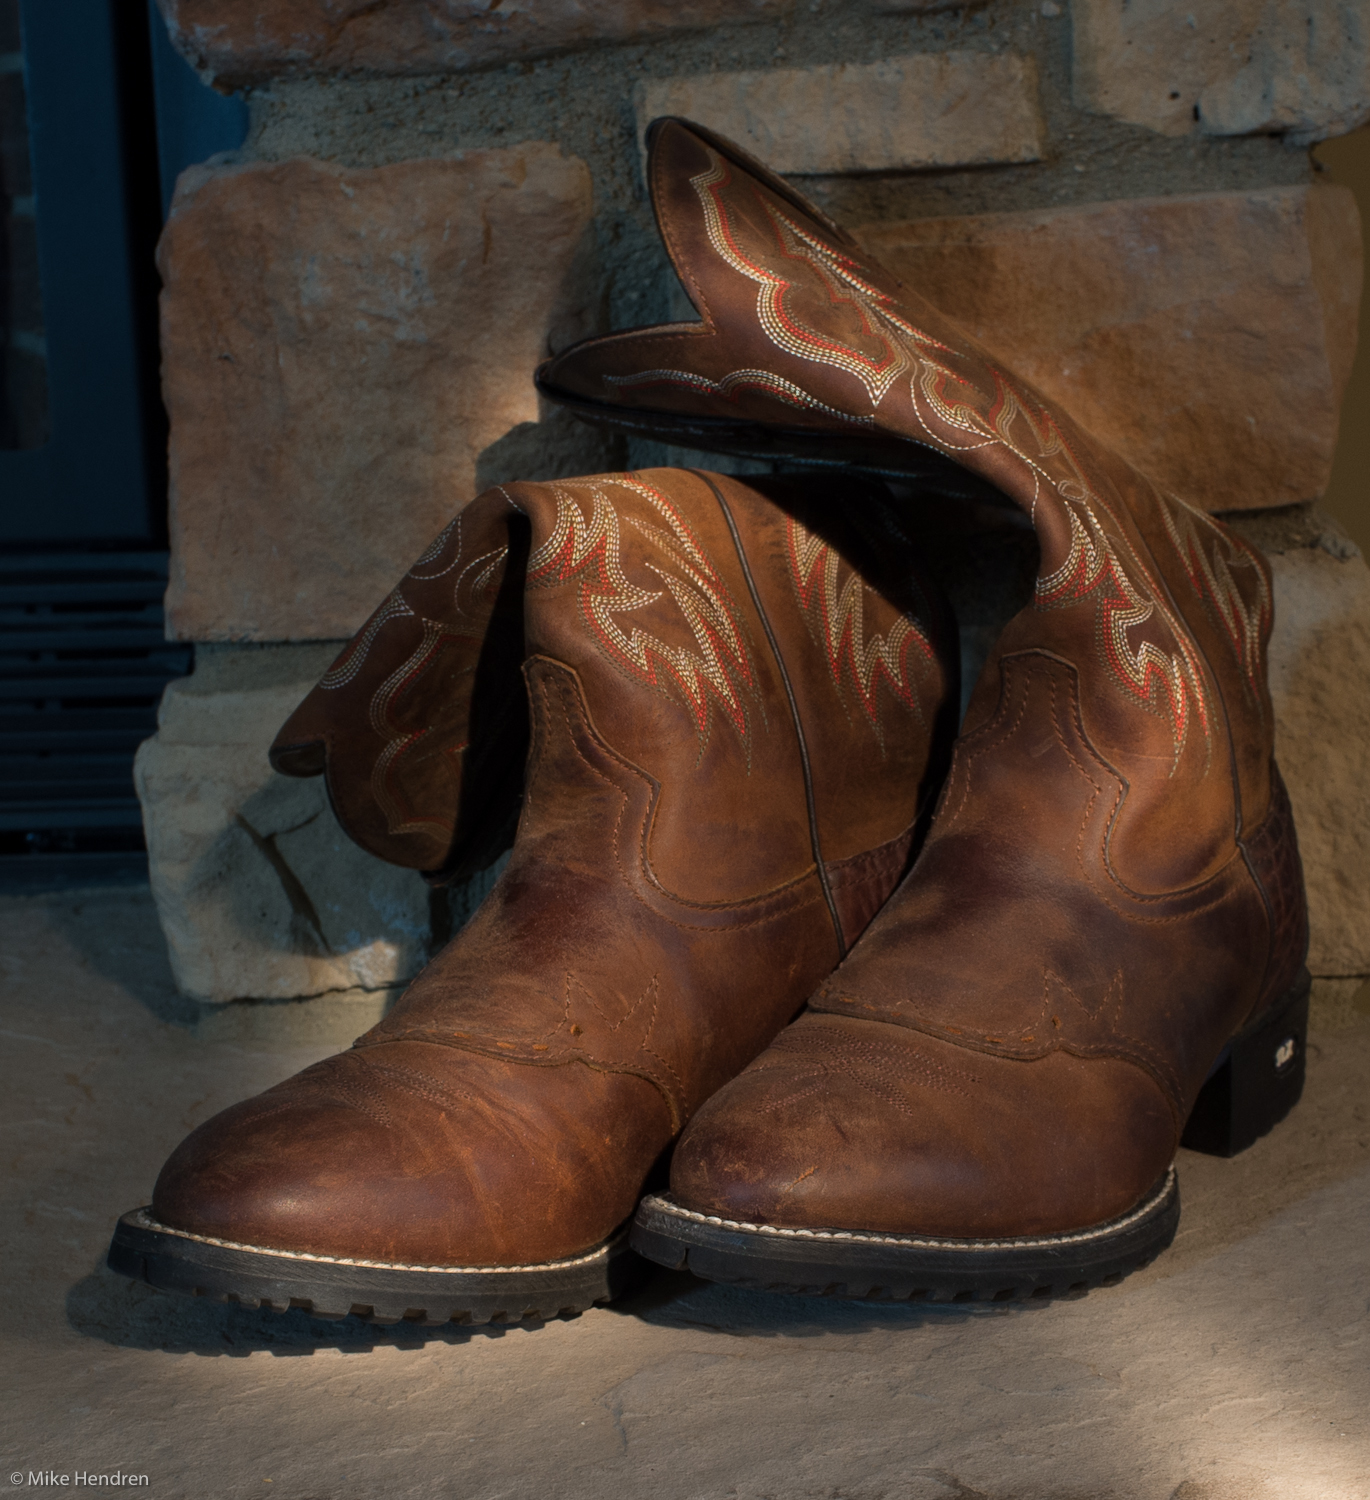
| Anti Motion Blur, ISO 6400, 1/125 second |
At first glance, the Sony NEX-7 has two almost identical modes: Anti Motion Blur and Hand-Held Twilight. After reading the manufacturer’s handbook (not much help, there), and using both modes a few times, I still couldn’t see much difference. Mainly, I suppose, because the differences while important are also very subtle.
I finally talked to the Sony rep at my local camera store and he explained it this way:
- The Anti Motion Blur (AMB) mode is for when your subject could move during the exposure. The camera tries to use a higher shutter speed (and possibly a higher ISO) to try and freeze that motion. Then, the in-camera processing attempts to also negate that motion as it combines the 6 exposures, reducing noise in the process.
- Hand-Held Twilight (HHT), on the other hand, doesn’t care about subject motion. It just tries to choose an ISO / shutter speed combination that will allow the shot to be taken such that any camera movement will be offset, and, of course, noise also reduced during the in-camera processing.
The “rep” also said that, in general, HHT will produce better, cleaner images.
So, I did a very informal test and according to my results, he was right … but I’m still not sure of the exact reason. The HHT image is definitely cleaner with less noise and a bit more detail than the AMB image, but it also chose a lower ISO – 4000 as opposed to 6400 with the AMB shot.
What is a striking difference, though, is the differences between both of those modes and a normal Program AE shot at ISO 6400 or even 3200.
The top photo was done using AMB, ISO 6400 and 1/125th second. It produced a very nice, low noise image.
The next image was shot in Program AE, ISO 6400, and then a Noise Reduction setting of 50 in Lightroom 4. (I did this because the Program shots were done in RAW and thus had zero camera processing.)
 |
||
| Program AE, ISO 6400, Noise Reduction setting of 50 in Lightroom 4
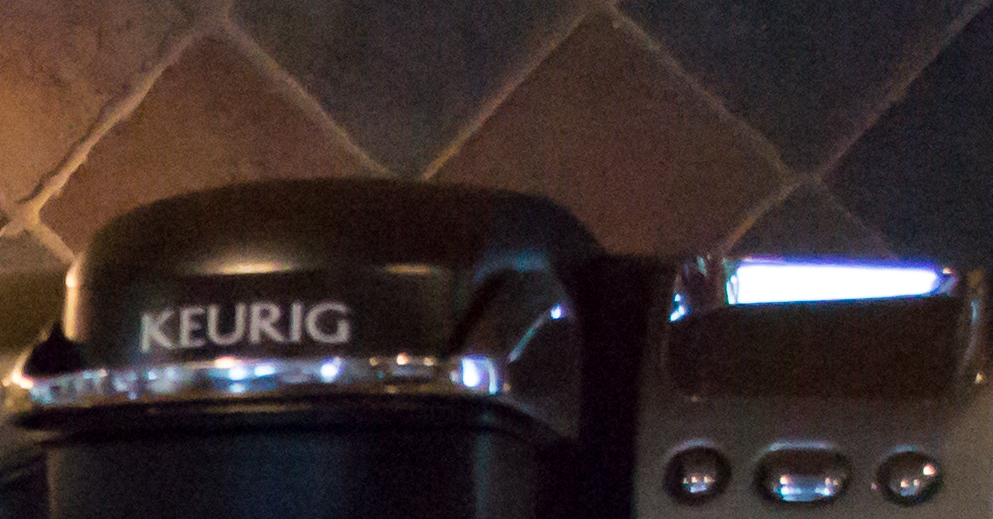
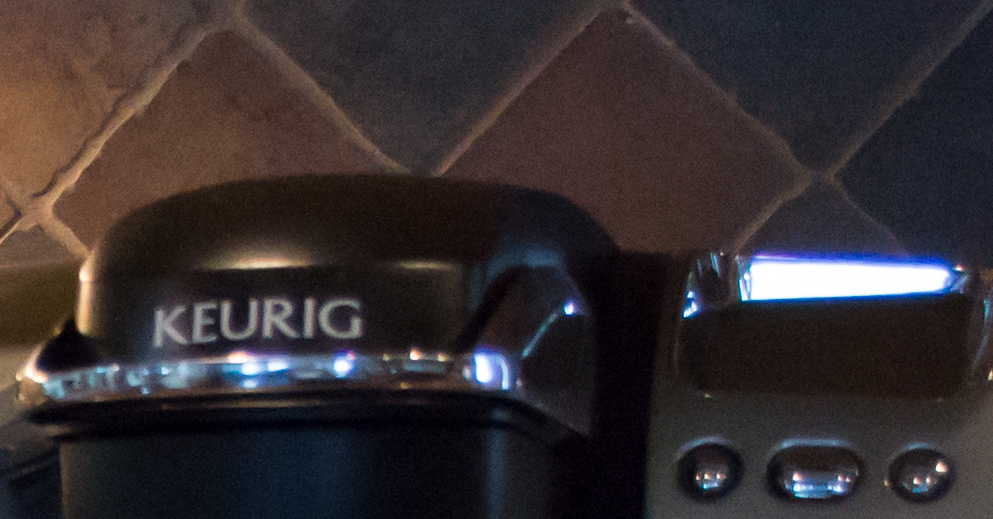
Below are the 100% crops of all 4 images. I think you will find it obvious that Hand-Held Twilight will be your preferred mode when you need a higher ISO and your subject will remain stationary.
|
 |
| Program AE, ISO 3200, Noise Reduction setting of 50 in Lightroom 4 |
 |
| Anti Motion Blur, ISO 6400, 1/125 second |
 |
| Hand-Held Twilight, ISO 4000, 1/60 second |