Macro with the Sony NEX-7

I just recently acquired the Sony NEX-7 and I am loving the camera! Even more recently, I got the Sony 30mm f/3.5 Macro lens to go with it. This is the E-mount lens and is relatively small and light (just under 5 oz.) so it fits nicely with the NEX-7.
After only a few shots, I am very pleased with the lens. It is very sharp with great color and contrast as you can see in the image of pins above, and the detail is truly amazing! These pins are of course very small to begin with, but in this image, you are able to pick out the tiny imperfections in the shafts of these pins.
Naturally, at 30mm, you must get very close to your subject in order to achieve the maximum 1:1 magnification … something less than an inch from the front of the lens. So it follows that it is not an ideal lens for live insects, plus you must be very careful of lighting since you can easily cast a shadow on your subject.
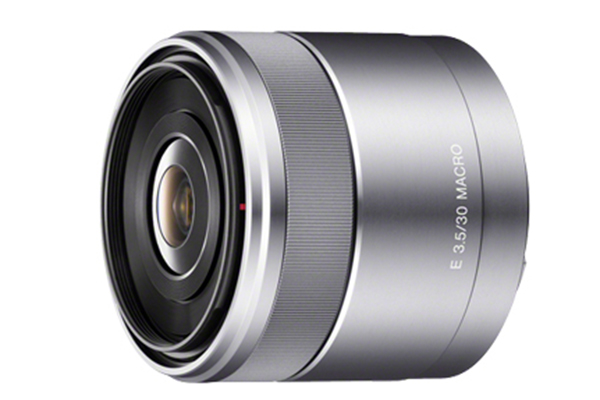
Build quality is excellent and the focus ring operates very smoothly. Focusing is very quiet and it also allows for Direct Manual Focus, which can be very helpful when shooting macro.
Overall, an excellent lens for a reasonable price at $250 (retail).

NEX-7 + Sony 18-200mm = Ridiculous!

First, let me say that, as an NEX-7 owner, I disagree with that. However, in various forums around the “web”, I’ve seen that claim being made so I thought I would address it.

Some of those statements have ranged from, “ridiculous” to “goofy looking” to “totally out of scale”. Well, it certainly isn’t any more out of scale than say a 70-200mm f/2.8 Nikon lens on a D90. Or, how about the other direction…the 35mm f/1.8 on a Nikon D3.

The bottom line is, I don’t care how it looks as long as I have a great lens/camera combination, which this is. One other consideration is that I can still put the 16mm pancake on the NEX-7 and stick it in my coat pocket…that ain’t gonna happen with a DSLR.

Now, don’t get me wrong – I love DSLRs and I’m not knocking them in any way. I’ve had many and they are awesome cameras. But, if I could get a great camera the size of a postage stamp and stick it to a big zoom, I’d do it.

I know – I know, there are some huge technical and practical difficulties with making that a reality like: battery, viewfinder, controls, screen, lens mount, etc. However, technically it could be done. The iPhone 4s has an 8Mp camera, so throw away the phone, antennas, and gps and you could end up with a very tiny stand alone camera. Wouldn’t that be cool!

So, are you ready – mentally – for the coming 54 Megapixel camera that you can wear on your wrist like a watch? It could be sooner than you think! 🙂

DSC00188-2012-02-17-12-37.jpg

Old Ford Truck – HDR

Near my home, is this old abandoned Ford truck sitting forlornly by the road. It looked pretty sad with no headlights, bullet riddled windshield, and paint so oxidized it was barely still red.

Luckily, the light was literally spot-lighting it at that time, so I took 3 quick bracketed shots with my Nikon D7000 (2-EV spacing).

Later, I combined the 3 images into an HDR using Nik HDR Efex Pro. Then, with another Nik program, Silver Efex Pro, I converted it to a black and white, tweaked the micro contrast and was done…well, except for some minor sharpening and noise reduction in Lightroom.

Stormy Times

Got some new or newly updated photo software? Take another look at some of your old images – you might be surprised at the new possibilities and capabilities. As photo software evolves, the options for photographers to enhance their images in new and interesting ways also improve.

I was going through my images and came across this image of a huge approaching thunderstorm hovering just above and behind my home in Colorado. I had, of course, already done the basic editing by adjusting exposure, color, and contrast but felt it needed something more to really bring out the drama of the scene.

I decided to run it through Nik’s HDR Efex Pro even though I only had the single exposure. HDR Efex did a wonderful job of dramatically increasing the texture in the clouds to reveal the turmoil that was taking place a few thousand feet above us.

So, every once in a while it’s worth our time to take another look at our images and consider how some new bit of software might enable us to improve on what’s already been done.

Luck

There’s a common saying that “Luck equals preparation plus opportunity.” I believe that.

Monument Valley in Arizona has some spectacular monolithic rock outcroppings and it’s best to be there at first light. I was there at dawn that day and got some nice photos of those big rocks they call “The Mittens”, but they were much like those taken by so many other photographers – nothing new.

A bit later in the morning after the sun was well up, I was driving through the park looking for more photo possibilities. I felt very lucky when I saw this hot air balloon just filling and getting ready for lift off.

I skidded to a stop, jumped out of my car and managed to fire off several shots as that colorful balloon slowly and majestically ascended right next to those huge rock formations. Wow, what a sight, but I’m sure the view was even better from inside the gondola as it soared over the valley.

Yes, I was lucky because I had a good camera that I knew how to use and I just happened to be in the right place at the right time (opportunity).

Many fine images are created by dedicated photographers who see a good location, have a creative idea, and then go there time after time until conditions enable them to execute that idea. But, many great images are a result of happenstance…just being there when it happens.

So prepare yourself, get out there, and get lucky!

Balancing Act

There was a big, bright full moon on Feb. 7th, so I hoped to get a great photo, but the clouds intervened. So, I did the next best thing…I took a daylight shot and made it look like a moonlight shot!

The next morning after the sun was well up, about 9:30 a.m., I took this photo. Then the fun started.

I almost always shoot in RAW because it gives me a few more options “after” I get the image on the computer and this was one of those cases. In Lightroom (4 beta), I just changed the white balance setting from “as shot” (which was daylight) to “tungsten”, which resulted in this bluish hue. I think it makes it look like it was taken at night under a bright moon instead of during a bright, mid-morning daytime.

We all know that colors can be manipulated, even with a jpg. However, this can sometimes result in added noise in the image. The big benefit of using a raw file and adjusting the color temp/white balance is that it is non-destructive and introduces no noise into the image.

Another thing I’ve learned is that with the newer Sonys (and many other cameras, I’m sure), is that you can actually preview this effect in the viewfinder before you even take the shot…nice!

Sony a65 w/Sony 16-50mm

The Megapixel Race – Perspective

Numbers have always fascinated me, but sometimes they can be a bit misleading, even though accurate. In the stock market for instance, if you lose 50% ($1,000 down to $500), it then takes a 100% gain to get back to even at $1,000.
A similar thing is happening in the “megapixel race” to bigger and bigger sensors in our digital cameras.
The new Nikon D800 boasts a 36 Mp sensor, which is huge(*see note) when compared to other currently available sensors. But just how much bigger is it? The image above show a comparison between three different sized sensors.
While the D800 sensor is significantly larger, at 50% more pixels than say the Sony NEX-7, that difference doesn’t translate into print sizes. In other words, at 300ppi, the 36 Mp image can print 24.5″ x 16.4″…the 24 Mp image can print 20″ x 13.3″. That’s only about 23% larger (dimensionally). The 16 Mp print would be 16.4″ x 10.9″, which means that the 36 Mp image only prints about 50% larger in spite of having well over twice as many pixels.
I don’t say any of this to detract from the D800…I would give my eye teeth to have one…however, I just find the numbers interesting in how they all fit together in different ways. It’s also interesting to note that, as sensors continue to increase in size, the jump in the number of megapixels will also have to get bigger to have a significant impact on print sizes. In order to get a print 50% than the 24 Mp NEX-7, the sensor would have to be 9,000 x 6,000, or 54 Megapixels!
So, start saving your money now for that next “super” computer you’ll need to be able to work with these huge files. $$$$

*NOTE: When talking about size, I’m strictly talking about resolution. The actual size of the Nikon D800 sensor is a normal “full frame” at 24mm x 35.9mm, while the Sony NEX-7 is an APS-C sized at 23.5mm x 15.6mm.